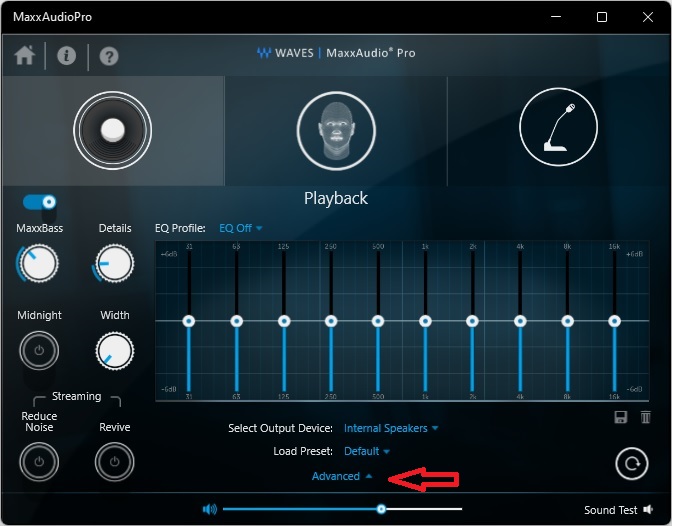
This was a head scratcher. Headphones stopped being detected when plugged into the front panel jack and audio output was only to the internal speakers. Long story short, a checkbox on the MaxxAudioPro utility had become unchecked.
Went thru the usual settings to check listed on many, many web pages and got nowhere. Sound in the control panel, sound settings, audio mixer, ran the audio troubleshooter, updated drivers, etc., all to no effect.
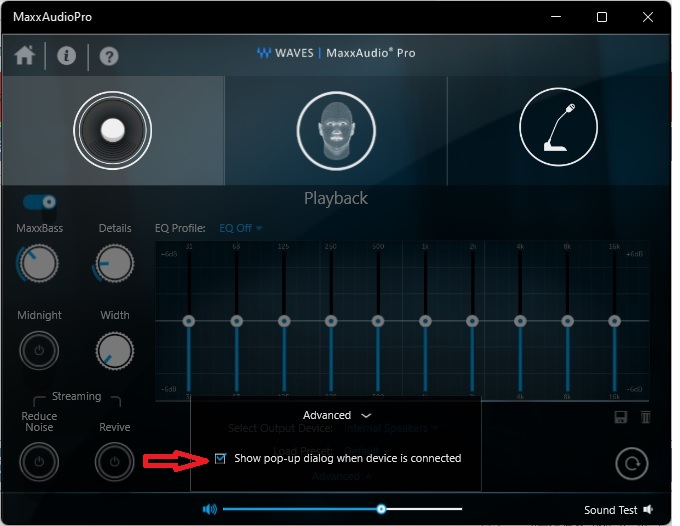
Finally realized the select popup had to come from somewhere and searched for apps that might be controlling the audio output. Found the MaxxAudioPro and under advanced settings there is a checkbox for dialog when devices are connected. It was unchecked. Enabling it restored audio to the headphones.
Original problem on an Optiplex but laptops also use the MaxxAudioPro so it’s not limited to a specific model.
Just discovered there is an option to join 22.04 to Active Directory when installing the OS. This worked smoothly and allowed immediate access authenticating against AD. The DHCP server must hand out a DNS address that works to resolve the domain name. Very important in home setups. There is no option to enter a different DNS server during setup. If it can’t find the AD server, the install will continue but without AD authentication.
The initial login screen shows only the local admin account created during setup. You need to select “not listed” and enter user@domain.name. If you just do the domain user name without the extension, it fails. After the local account setup is done, the domain user will appear as an option on the login screen.
If you use Quick Create in Windows 10/11 Hyper-V to make an Ubuntu VM, there is no option to domain join; you have to AD join manually following creation of the VM. Personally, I find it easier to manually create a VM and use auto join during install.
Caution if creating a virtual machine in Hyper-V. Be sure to first create an external virtual switch and assign it when configuring the VM. The default VM network connection is internal and will not connect to the AD domain controller. However, the test for connection will pass during configuration because setup is using the host network. It will fail during actual implementation because the VM is using its assigned virtual network switch, not the host.
To check which DNS servers Ubuntu uses: nmcli dev show | grep DNS
The following is how to domain join after the OS is installed or if you are using an earlier version that 22.04.
Ran thru a bunch of instruction sets for authenticating to a domain and the one below worked the first time and easy to implement. You might want use a test virtual machine first as you can brick it but I did live on real hardware, no problem. However, there are 2 gotchas left out of the instructions: First, before starting, add the computer to be joined to Windows DNS otherwise you get a lot of messages saying computer not found while following the instructions. However, it will join and authenticate. Second, you need to enable and start the systemd.resolved service once you’ve finished joining. My machine could not connect to the internet or authenticate at the GUI until that was done; however, the SSH connection in the demo did work. No issues after restarting the service. I’m not sure if it’s even necessary to disable the service but that’s for later.
He does go thru the commands fast and it’s sometimes difficult to stop on the text plus the font is small and hard to read, so here are the basics. Check the video for explanations.
First install all the required packages. sudo apt -y install realmd libnss-sss libpam-sss sssd sssd-tools adcli samba-common-bin oddjob oddjob-mkhomedir packagekit
Next stop the local DNS resolution and verify. sudo systemctl disable systemd-resolved.service then stop – just replace disable with stop then status – replace stop with status
Set host name to match AD schema hostname.sub.domain.extension e.g. ubuntu1.internal.bogus.org
Configure DNS sudo nano /etc/resolv.conf replace nameserver 127.0.0.1 with nameserver AD DNS server address
Test DNS connection realm discover internal.bogus.org
Enter name of computer into AD DNS otherwise get error message “unable to resolve hostname.sub.domain.bogus.org” It will still connect but error messages continue the thru rest of the process.
Join AD sudo realm join -U someADadmin internal.bogus.org You’ll get a prompt for the password. No output when successful.
Check you have joined realm list
Halfway done. Now you have to allow users to authenticate against AD and create home directories
Update pam sudo pam-auth-update check box for “Create home directory on login”
restart sssd sudo systemctl restart sssd sudo systemctl status sssd
allow AD users to login to the computer sudo realm permit –all
See video on how to make domain admins local sudo holders
Enable and restart DNS resolution or you have problems reaching the network and logging in
logout AD login by selecting “not listed?” enter AD user in the form: user@internal.bogus.org Caution on AD usernames that start with numbers or anything other than a letter, these violate Ubuntu naming standards.